In this post we are going to discuss one of the important SharePoint concept know as the Client / App part.
What is Client Part
Client/App Part are partially similar to share point web part but are not web part.end users always are existed t know about web parts and the easiness, how they could add a web part, editing a page and inserting a web part on a SharePoint page and see some compelling functionality out of it.Apps can also work similar to web part. It is not a real web part it something similar to it. Client part lives in an Iframe looks similar to web part but does not have full functionality as what a SharePoint web part does have.
Let's develop a client part. To start with let's open visual studio in administrator mode.
Open a new project of type "Apps for SharePoint 2013" template under Visual C#> Office / SharePoint > Apps.
Enter the project name as "DemoSPHAppWithCPandCA" and provide the location where the code will reside. Click ok.Then it would It will open the wizard to create the project. Select the site where you want to deploy the app . Select Hosting option as SharePoint-hosted. Once you click on finish. The SharePoint hosted app Project is created for you.
Right click on the project ,Add new item , Select "Client web part" and enter the name of your client web part then click on Add button.
A new wizard is started, where you can enter your Client \ App part Name and Select / Create the Page which you want to show on the App part, for this scenario we will create a new page, then Click on Finish.Now in the Solution,you would see the app part and the newly created page, which will be rendered in the App part.
If you see the code snippet for "DemoClientWebPart.aspx" page. The "<WebPartPages:AllowFraming ID='AllowFraming' runat='server' />" which is required to allow the page to show in IFrame.
What we are going to accomplish is , create a custom app part property and render that property on the Client/App part.
Let's open the "element.xml" for the DemoClientWebPartPage.aspx ,Modify the Client part title, add a custom web property "PageTitle" and modify the "src" attribute of the Content type element,check the query string format as below.
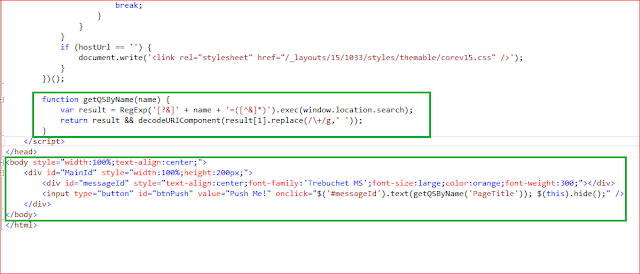
Add in the html, css and java script to the "DemoClientWebPartPage.aspx" page as below.
Save the modified pages and run the solution.Navigate to the Host web and click on edit page. click on the insert tab on the page ribbon. Click on the App part and select the app part with the title "Demo Client Part" and click on ADD as below.
On Clicking the "Push Me!" caption button on the Client / App part. you should see the desired text result as below.


No comments:
Post a Comment